Computer-Based Exams
1. For online exams, first, check their valid ID, review their allowed materials, and allow them to put non-permitted items in a locker.
2. When they are ready to begin their exam, click “start exam” in the proctoring tool.

3. Enter in the seat number. *Note: On this page, you can also edit the exam time limit or add any admin notes.

4. The student will sit down at their desk in the testing room. They will double click the test icon and begin going through the computer prompts.
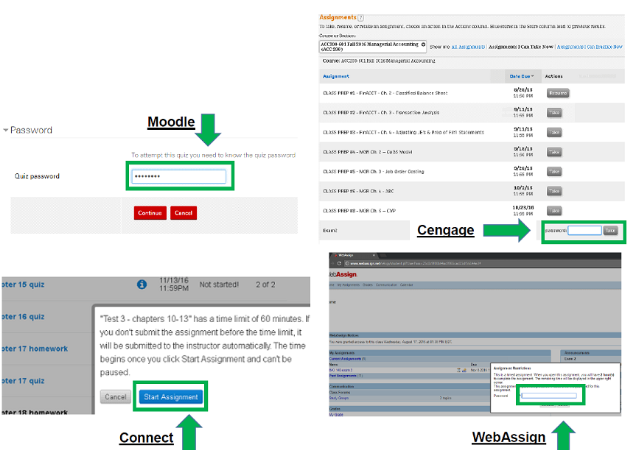
5. The student will select the learning management system (LMS)–Moodle, WebAssign, Cengage, or Connect–depending on where their exam is located. This information can be found within the exam column in the proctoring tool.

6. Students will need to navigate through their course website to reach the exam. Students should be familiar with where to locate their exam.
7. Once the student has clicked on their exam link, a password screen will pop up. *Note: The password screen might look different depending on which LMS the student is in.

8. Click on the password in the proctoring tool. Once the password is highlighted, press “Ctrl + C” to copy the password.
9. Click in the password box on the student’s exam page and press “Ctrl + V” to paste it into the box.
10. Once the password is entered, click “Print Screen” to clear the clipboard.
11. Click “start exam” (on the student’s screen) or “enter” (on the keyboard) to begin the test for the student.
12. You will then exit the student’s computer by clicking the big red “X” in the top right corner (of the viewing window) to exit NetSupport.